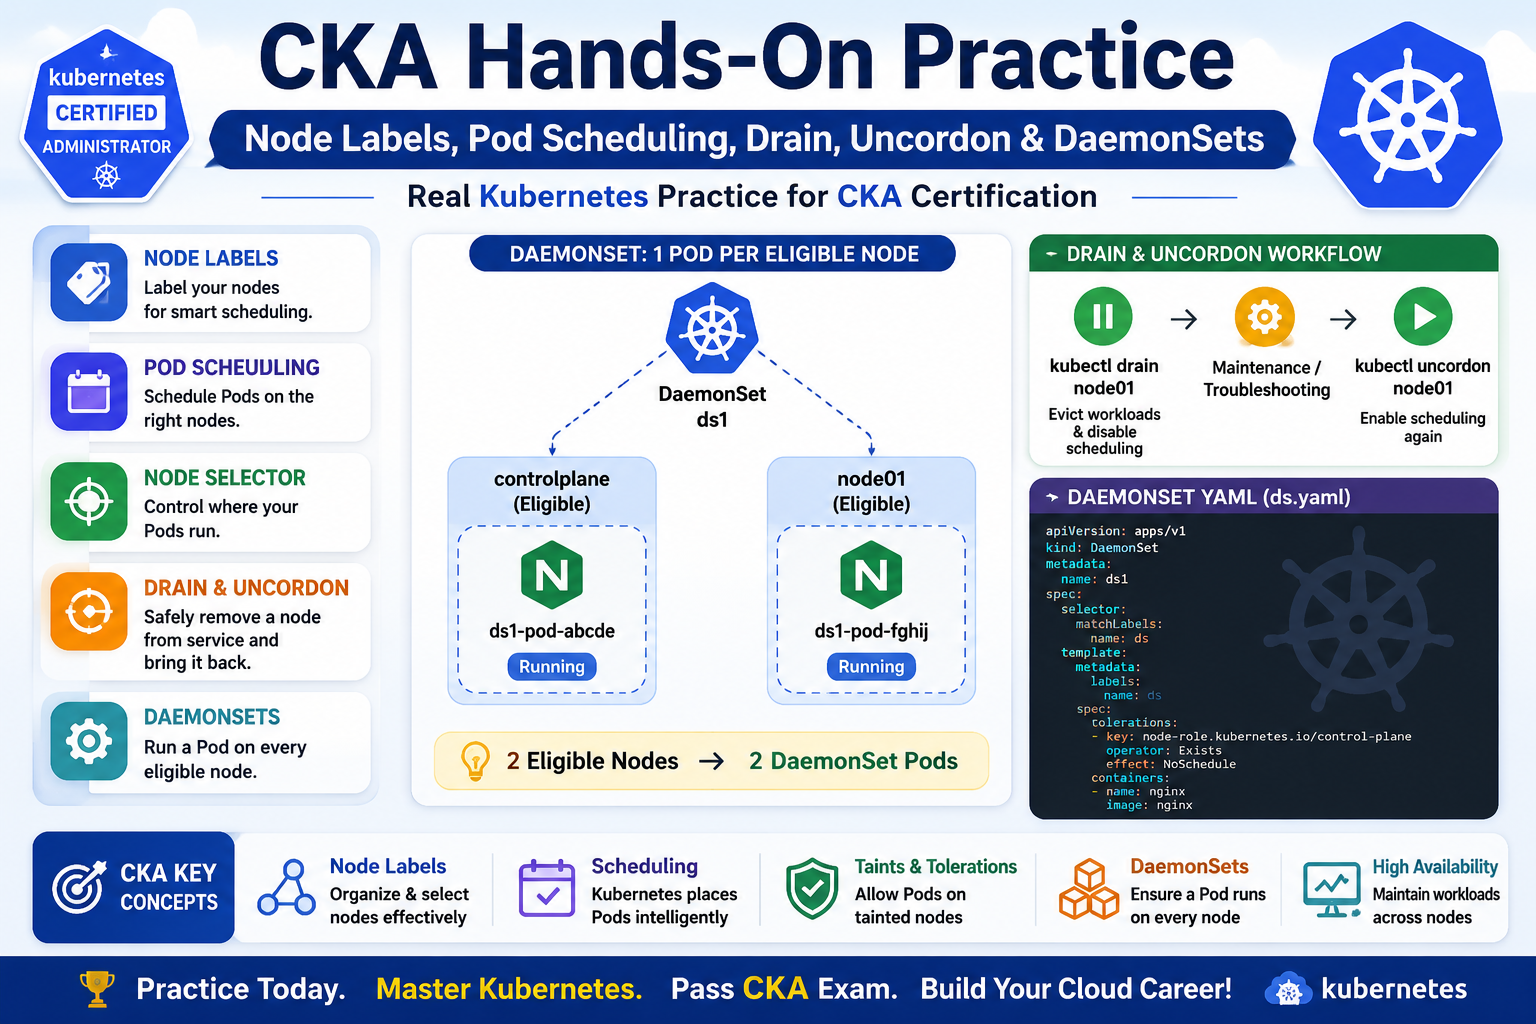
The main topics I practiced were:
- Kubernetes Node Labels
- Pod Scheduling
nodeSelectorkubectl drainkubectl uncordon- DaemonSets
- DaemonSet Pods on multiple nodes
- Taints and Tolerations
- Troubleshooting YAML errors
1. Checking Kubernetes Nodes
I started by checking the nodes in the cluster:
kubectl get nodes
Example:
NAME STATUS ROLES VERSIONcontrolplane Ready control-plane v1.35.1node01 Ready <none> v1.35.1
My practice cluster contains two nodes:
controlplanenode01
Both nodes were in the Ready state.
2. Working with Node Labels
Next, I practiced Kubernetes node labels.
First, I checked the existing labels:
kubectl get nodes --show-labels
Then I added a label to node01:
kubectl label node node01 disk=ssd
Now node01 has:
disk=ssd
To verify:
kubectl get nodes --show-labels
Changing an Existing Label
I also practiced changing an existing label:
kubectl label node node01 disk=spinning --overwrite
The --overwrite option is important when the label already exists.
To change it back:
kubectl label node node01 disk=ssd --overwrite
CKA Tip
Remember:
kubectl label node <node-name> key=value
If the label already exists:
kubectl label node <node-name> key=value --overwrite
3. Creating a Pod for Scheduling Practice
I created an NGINX Pod YAML file using:
kubectl run pod1 --image=nginx --dry-run=client -o yaml > pod1.yaml
Then I edited the YAML:
vim pod1.yaml
After that, I created the Pod:
kubectl apply -f pod1.yaml
To check where the Pod was scheduled:
kubectl get pods -o wide
The -o wide option is particularly useful because it shows the NODE where the Pod is running.
4. Troubleshooting Pod Scheduling
I also changed the node label from:
disk=ssd
to:
disk=spinning
and observed the scheduling behavior.
This helped me understand an important Kubernetes concept:
Kubernetes scheduling depends on Pod requirements and node properties.
For example, if a Pod contains:
spec: nodeSelector: disk: ssd
then Kubernetes will look for a node having:
disk=ssd
If no suitable node exists, the Pod may remain in:
Pending
This is an important concept for the CKA exam.
5. Using kubectl drain
Next, I practiced safely removing workloads from a node.
The command I used was:
kubectl drain node01 --delete-emptydir-data--ignore-daemonsets--force
kubectl drain marks the node as unavailable for normal Pod scheduling and attempts to evict existing workloads.
After draining:
kubectl get nodes
The node becomes:
SchedulingDisabled
Important CKA Option
The correct option is:
--ignore-daemonsets
This tells Kubernetes not to try to delete DaemonSet-managed Pods during the drain operation.
6. Using kubectl uncordon
After completing the drain exercise, I enabled scheduling on the node again:
kubectl uncordon node01
Then:
kubectl get nodes
The node returned to normal scheduling.
The basic workflow is:
kubectl drain node01 ↓SchedulingDisabled ↓Workloads are evicted ↓Maintenance / troubleshooting ↓kubectl uncordon node01 ↓Scheduling enabled
7. Creating a Kubernetes DaemonSet
The next major exercise was creating a DaemonSet.
My ds.yaml contained:
apiVersion: apps/v1kind: DaemonSetmetadata: name: ds1spec: selector: matchLabels: name: ds template: metadata: labels: name: ds spec: tolerations: - key: node-role.kubernetes.io/control-plane operator: Exists effect: NoSchedule containers: - name: nginx image: nginx
I created the DaemonSet using:
kubectl apply -f ds.yaml
Then checked it:
kubectl get daemonsets
8. Understanding DaemonSet Pods
A very important thing I learned today is that a DaemonSet is different from a Deployment.
With a Deployment, we might specify:
replicas: 2
which means:
2 Pods
But with a DaemonSet, we normally don’t specify replicas.
A DaemonSet automatically creates one Pod on each eligible node.
For example:
2 eligible nodes ↓DaemonSet ↓Pod 1 → controlplanePod 2 → node01
Therefore:
DESIRED = 2CURRENT = 2
If there are three eligible nodes:
3 nodes ↓3 DaemonSet Pods
If there are four eligible nodes:
4 nodes ↓4 DaemonSet Pods
9. Why My DaemonSet Needed a Toleration
Normally, the control-plane node has a taint that prevents regular workloads from being scheduled there.
I added this toleration:
tolerations:- key: node-role.kubernetes.io/control-plane operator: Exists effect: NoSchedule
This allows the DaemonSet Pod to tolerate the control-plane’s NoSchedule taint.
As a result, my DaemonSet could run on both:
controlplanenode01
So:
DaemonSet ds1 | +--------+--------+ | | ↓ ↓ controlplane node01 | | nginx Pod nginx Pod
10. Verifying the DaemonSet
I used:
kubectl get daemonsets
and:
kubectl get pods
For more detailed information:
kubectl get pods -o wide
The -o wide output allows me to see which node is running each Pod.
For example:
NAME READY STATUS NODEds1-xxxxx 1/1 Running controlplaneds1-yyyyy 1/1 Running node01
This confirms that the DaemonSet is working correctly.
11. YAML Troubleshooting
During today’s practice, I also encountered a YAML indentation problem.
The error was similar to:
error parsing ds.yaml:error converting YAML to JSON:yaml: line 12: did not find expected key
The problem was caused by incorrect indentation around:
template: metadata: ... spec:
Kubernetes YAML is indentation-sensitive, so even a small indentation mistake can prevent the manifest from being accepted.
A properly structured DaemonSet should follow this hierarchy:
DaemonSet └── spec ├── selector └── template ├── metadata └── spec ├── tolerations └── containers
12. Commands Practiced Today
Here is my main command list from today’s CKA practice:
kubectl get nodeskubectl get nodes --show-labelskubectl label node node01 disk=ssdkubectl label node node01 disk=spinning --overwritekubectl run pod1 --image=nginx --dry-run=client -o yaml > pod1.yamlkubectl apply -f pod1.yamlkubectl get pods -o widekubectl describe pod pod1kubectl delete pod pod1kubectl drain node01 \--delete-emptydir-data \--ignore-daemonsets \--forcekubectl get nodeskubectl uncordon node01kubectl apply -f ds.yamlkubectl get daemonsetskubectl get podskubectl get pods -o widekubectl delete ds ds1
Key Takeaways from Today’s Practice
Today’s practice helped me understand several important Kubernetes concepts:
Node Labels
Node → Labels → Scheduling decisions
Pod Scheduling
Pod requirements ↓Kubernetes Scheduler ↓Suitable Node
Drain
drain → disable scheduling + evict workloads
Uncordon
uncordon → enable scheduling again
DaemonSet
1 eligible node ↓1 Pod2 eligible nodes ↓2 Pods
Tolerations
Node Taint ↓Pod needs matching Toleration ↓Pod can be scheduled
Conclusion
Today was a productive CKA hands-on Kubernetes practice session. I worked through node labels, Pod scheduling, node draining, uncordoning, DaemonSets, tolerations, and YAML troubleshooting.
The most important lesson was understanding the relationship between nodes, labels, taints, tolerations, scheduling, and DaemonSets.