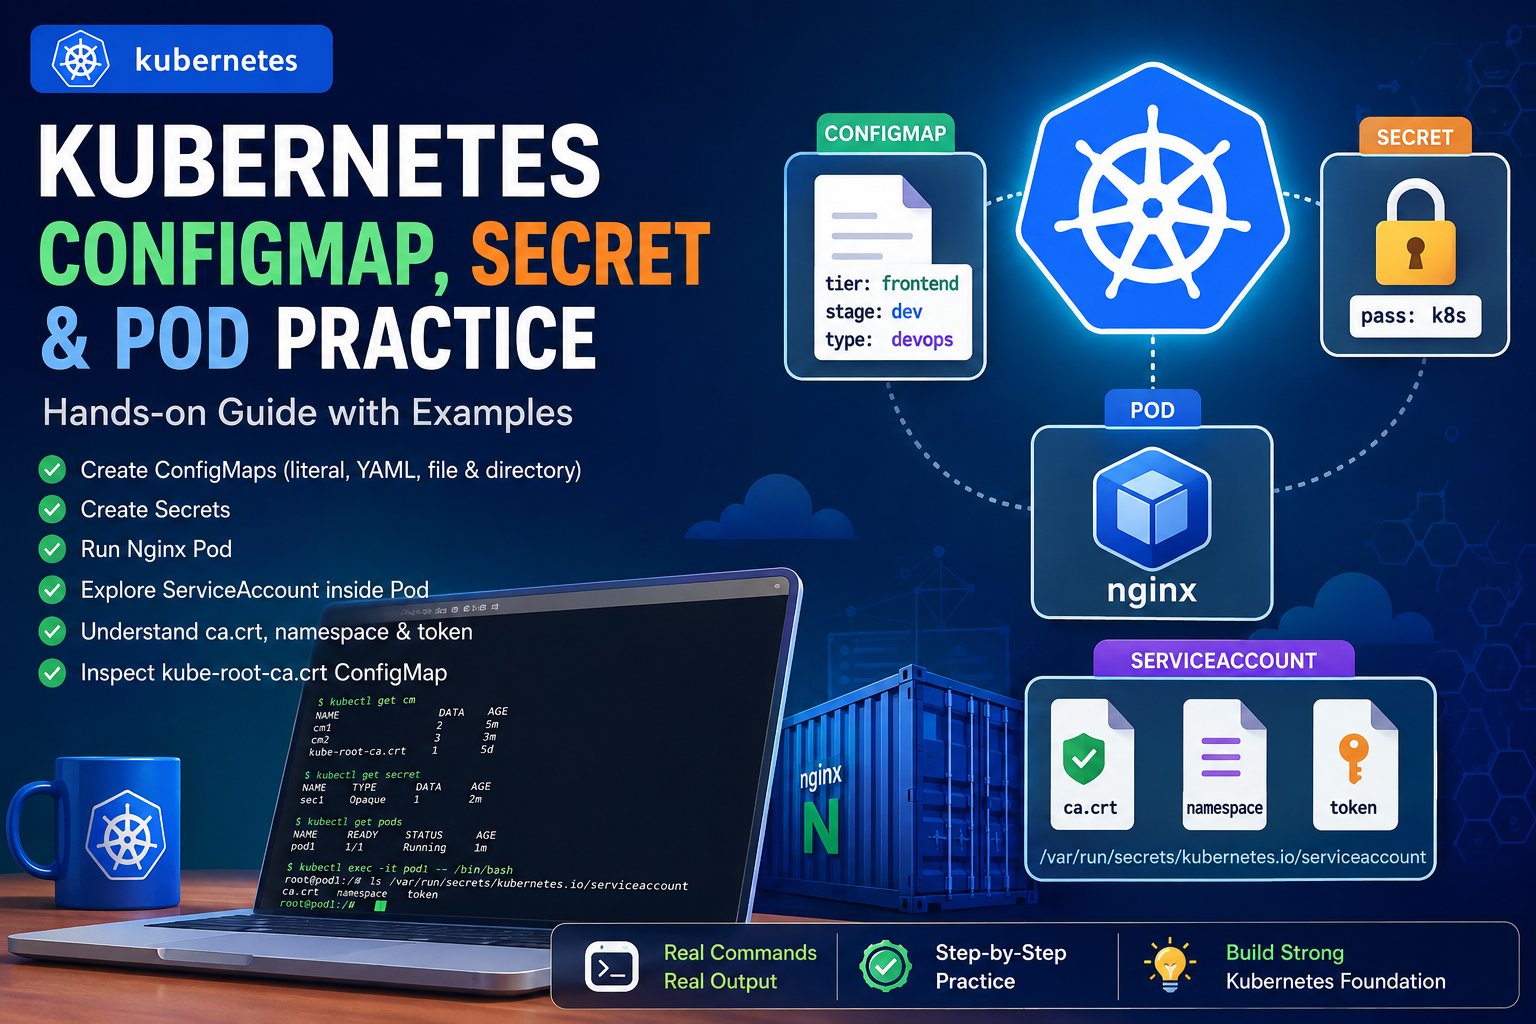
Kubernetes provides several powerful mechanisms for managing application configuration, sensitive information, containers, and access to the Kubernetes API.
In this hands-on practice, I worked through:
- ConfigMaps using literal values
- ConfigMaps using YAML
- Updating ConfigMaps
- ConfigMaps from files
- ConfigMaps from directories
- Secrets
- Creating and inspecting Pods
- Accessing a running container with
kubectl exec - Exploring the ServiceAccount files automatically mounted inside a Pod
- Understanding
ca.crt,namespace, andtoken - Inspecting the
kube-root-ca.crtConfigMap
This article documents the complete workflow step by step.
1. Checking Existing ConfigMaps
I started by checking the ConfigMaps already available in the namespace.
kubectl get cmFlow
Terminal
   ↓
kubectl get cm
   ↓
Kubernetes API Server
   ↓
List of ConfigMaps
A ConfigMap is used to store non-sensitive configuration data separately from application code.
2. Creating a ConfigMap with Literal Values
I created a ConfigMap called cm1 using literal values:
kubectl create configmap cm1 \
  --from-literal=user=john \
  --from-literal=pass=k8s
The ConfigMap contains:
user = john
pass = k8s
Flow
                kubectl create configmap
                         │
                         ↓
                 ConfigMap: cm1
                         │
              ┌──────────┴──────────┐
              ↓                     ↓
          user=john              pass=k8s
Important: Although this was useful for practicing ConfigMaps, passwords and other sensitive values should normally be stored in a Secret, not a ConfigMap.
3. Viewing the ConfigMap
After creating cm1, I verified it using:
kubectl get cmThen:
kubectl describe cm cm1And finally:
kubectl get cm cm1 -o yamlWhy use these commands?
| Command | Purpose |
|---|---|
kubectl get cm | List ConfigMaps |
kubectl describe cm cm1 | Show detailed information |
kubectl get cm cm1 -o yaml | Display the complete YAML representation |
4. Creating a ConfigMap YAML File with Dry Run
Next, I practiced generating a YAML file without immediately creating the Kubernetes resource.
kubectl create cm cm2 \
  --from-literal=tier=frontend \
  --dry-run=client -o yaml > cm.yaml
The important part is:
--dry-run=clientThis tells kubectl to generate the resource locally without sending it to the Kubernetes API Server.
The output is saved into:
cm.yamlFlow
kubectl create cm
       │
       ↓
--dry-run=client
       │
       ↓
Generate YAML only
       │
       ↓
cm.yaml
       │
       X
No ConfigMap created yet
5. Editing the YAML File
I opened the generated YAML:
vim cm.yamlFor example:
apiVersion: v1
kind: ConfigMap
metadata:
  name: cm2
data:
  tier: frontend
  stage: dev
  type: devops
This is an important Kubernetes workflow:
Generate YAML
     ↓
Edit YAML
     ↓
Apply YAML
6. Creating the ConfigMap Using kubectl apply
After editing the YAML, I created the ConfigMap:
kubectl apply -f cm.yamlThen I verified it:
kubectl get cmand:
kubectl describe cm cm2Flow
cm.yaml
   ↓
kubectl apply -f cm.yaml
   ↓
Kubernetes API Server
   ↓
ConfigMap: cm2
   ↓
tier=frontend
stage=dev
type=devops
7. Updating an Existing ConfigMap
I edited the YAML again:
vim cm.yamlAfter making changes:
kubectl apply -f cm.yamlThen:
kubectl describe cm cm2This demonstrates one of the most important Kubernetes workflows:
Existing Resource
       ↓
Modify YAML
       ↓
kubectl apply
       ↓
Kubernetes updates Resource
       ↓
kubectl describe
       ↓
Verify
8. Editing a Live ConfigMap
I also practiced:
kubectl edit cm cm2This opens the live Kubernetes object in an editor.
After saving the changes, Kubernetes updates the ConfigMap.
I then verified the result:
kubectl describe cm cm2YAML editing vs live editing
YAML-based approach:

cm.yaml
   ↓
edit
   ↓
kubectl apply
   ↓
ConfigMap


Live approach:

kubectl edit cm cm2
   ↓
Edit live object
   ↓
Save
   ↓
ConfigMap updated
For real production environments, keeping configuration in version-controlled YAML or a GitOps workflow is generally preferable to making undocumented live changes.
9. Learning Kubernetes Secrets
Next, I moved from ConfigMaps to Secrets.
First:
kubectl get secretI also checked the help information:
kubectl create secret -h | lessand:
kubectl create secret generic -h | lessKubernetes supports several Secret types, including:
- Generic Secrets
- Docker registry Secrets
- TLS Secrets
10. Creating a Generic Secret
I created a Secret using:
kubectl create secret generic sec1 \
  --from-literal=pass=k8s
Then:
kubectl get secretand:
kubectl describe secret sec1Flow
Password
   ↓
kubectl create secret generic
   ↓
Secret: sec1
   ↓
pass
   ↓
Kubernetes Secret object
A Secret is intended for sensitive information such as:
- Passwords
- API tokens
- Credentials
- TLS certificates
- Private keys
Important security note
Kubernetes Secret data is commonly stored as Base64-encoded data. Base64 is not encryption. Proper access control, encryption at rest, RBAC, and secure secret-management practices are still important.
11. Creating a ConfigMap from a File
I then practiced creating a ConfigMap from an existing file.
First:
cat /etc/hostsThen I copied the file:
cp /etc/hosts .After checking the file:
lsI created the ConfigMap:
kubectl create configmap hostscm --from-file=./hostsThen:
kubectl describe cm hostscmFlow
/etc/hosts
     ↓
cp /etc/hosts .
     ↓
./hosts
     ↓
kubectl create configmap hostscm --from-file=./hosts
     ↓
ConfigMap: hostscm
     ↓
hosts = file contents
This demonstrates that ConfigMaps can contain complete files, not just individual key/value pairs.
12. Creating a ConfigMap from /etc/passwd
I also practiced with another file:
cp /etc/passwd .Then:
kubectl create configmap passwdcm --from-file=./passwdAnd inspected it:
kubectl describe cm passwdcmThe important concept is:
File
 ↓
--from-file
 ↓
ConfigMap
Note:
/etc/passwdis used here only as a practice file. In real environments, avoid placing sensitive system information or credentials into ConfigMaps.
13. Creating a ConfigMap from a Directory
Next, I created a directory:
mkdir contentThen copied two files into it:
cp /etc/hosts content/
cp /etc/passwd content/
The directory looked like:
content/
├── hosts
└── passwd
Then I created a ConfigMap:
kubectl create configmap testcm --from-file=contentAnd inspected it:
kubectl describe cm testcmFlow
             content/
             /      \
            /        \
        hosts       passwd
           \          /
            \        /
             ↓      ↓
       --from-file=content
                ↓
          ConfigMap testcm
                ↓
       ┌─────────────────┐
       │ hosts           │
       │ passwd          │
       └─────────────────┘
This is useful when an application requires several configuration files.
14. Checking Files in the Directory
I used:
ls -l content/to verify the files.
The basic workflow was:
Create directory
      ↓
Copy configuration files
      ↓
Verify files
      ↓
Create ConfigMap
      ↓
Describe ConfigMap
15. Deleting Multiple ConfigMaps
The correct command for deleting multiple ConfigMaps is:
kubectl delete cm hostscm passwdcm testcmYou can also use shell brace expansion:
kubectl delete cm {hostscm,passwdcm,testcm}A command such as:
kubectl delete cm{hostscm,passwdcm,testcm}is not correct, because the resource type and resource names need to be separated.
After deletion:
kubectl get cmcan be used to verify what remains.
16. Creating an Nginx Pod
Next, I started practicing Pods.
kubectl run pod1 --image=nginxThen:
kubectl get podsExample workflow:
kubectl run pod1
      ↓
Kubernetes API Server
      ↓
Pod created
      ↓
Scheduler
      ↓
Node
      ↓
Nginx container
      ↓
Running
17. Inspecting the Pod
I used:
kubectl describe pod pod1I also practiced:
kubectl describe pod/pod1and:
kubectl describe pod/pod1 | lessWhy use describe?
kubectl describe is extremely useful when troubleshooting Kubernetes resources.
For a Pod, it can show:
- Pod name
- Namespace
- Node
- IP address
- Container image
- Container state
- Volumes
- Conditions
- Events
The Events section is particularly useful when investigating problems such as:
- Image pull failures
- Scheduling problems
- Container startup failures
- Volume mount issues
18. Entering the Nginx Container
I then entered the running container:
kubectl exec -it pod1 -- /bin/bashThe prompt changed to something similar to:
root@pod1:/#This means I was now working inside the container.
Flow
Control Plane Terminal
       ↓
kubectl exec -it pod1 -- /bin/bash
       ↓
Pod: pod1
       ↓
Nginx Container
       ↓
Interactive Bash Shell
       ↓
root@pod1:/#
19. Exploring the Container Filesystem
Inside the container, I ran:
lsThis showed directories such as:
bin
boot
dev
etc
home
lib
mnt
opt
proc
root
run
sbin
tmp
usr
var
This is a normal Linux filesystem inside the Nginx container.
20. Exploring the ServiceAccount Directory
One of the most useful parts of the practice was exploring:
cd /var/run/secrets/kubernetes.io/serviceaccountThen:
lsI found:
ca.crt
namespace
token
These files are associated with the Pod’s ServiceAccount credentials and Kubernetes API access.
Flow
Pod
 │
 └── /var/run/secrets/
       │
       └── kubernetes.io/
             │
             └── serviceaccount/
                   │
                   ├── ca.crt
                   ├── namespace
                   └── token
21. Understanding ca.crt
I checked the file:
cat ca.crtand saw certificate content beginning with:
-----BEGIN CERTIFICATE-----The ca.crt file provides the CA certificate used to verify the Kubernetes API Server’s certificate when communicating through the cluster’s internal API endpoint.
Conceptually:
Pod
 │
 │ HTTPS
 ↓
Kubernetes API Server
 │
 │ Certificate verification
 ↑
ca.crt
22. Understanding namespace
The namespace file contains the namespace associated with the Pod.
For example:
cat namespaceIt can be used by applications running inside the Pod to determine which Kubernetes namespace they are operating in.
23. Understanding token
The token file contains the ServiceAccount authentication token made available to the Pod.
An application that has appropriate permissions can use the ServiceAccount identity to communicate with the Kubernetes API Server.
The important security concept is:
Pod
 ↓
ServiceAccount
 ↓
Token
 ↓
Kubernetes API
 ↓
RBAC permissions
The token alone does not mean the application can perform every Kubernetes operation. Its capabilities are controlled by Kubernetes authorization, especially RBAC.
24. Understanding the ..data Symlinks
I also used:
ls -land observed links similar to:
ca.crt     -> ..data/ca.crt
namespace  -> ..data/namespace
token      -> ..data/token
This is related to how Kubernetes manages projected/secret volume data.
Conceptually:
serviceaccount/
      │
      ├── ca.crt ───────┐
      ├── namespace ────┼──→ ..data/
      └── token ────────┘
Kubernetes manages the underlying data directory and the visible paths.
25. Understanding kube-root-ca.crt
Back on the control-plane terminal, I checked:
kubectl get cmThen:
kubectl describe cm kube-root-ca.crtThe cluster had a ConfigMap named:
kube-root-ca.crtThis ConfigMap contains the CA bundle used for verifying the Kubernetes API Server when using appropriate internal cluster endpoints.
This connects nicely with what we saw inside the Pod:
Kubernetes
    │
    ├── kube-root-ca.crt ConfigMap
    │
    └── Pod ServiceAccount-related mount
              │
              └── ca.crt
26. Complete Practice Flow
The complete hands-on learning path can be represented like this:
                    KUBERNETES PRACTICE
                           │
        ┌──────────────────┼──────────────────┐
        ↓                  ↓                  ↓
    ConfigMap            Secret              Pod
        │                  │                  │
        ↓                  ↓                  ↓
  Literal values      Sensitive data      nginx image
        │                  │                  │
        ↓                  ↓                  ↓
      cm1                sec1              pod1
        │                                     │
        ↓                                     ↓
   YAML / cm2                           kubectl describe
        │                                     │
        ↓                                     ↓
   vim + apply                          kubectl exec
        │                                     │
        ↓                                     ↓
  Update / edit                    Container filesystem
                                              │
                                              ↓
                                    ServiceAccount
                                              │
                              ┌───────────────┼──────────────┐
                              ↓               ↓              ↓
                           ca.crt         namespace        token
                              │
                              ↓
                    Kubernetes API Server
27. What I Learned from This Practice
This hands-on session helped me understand several important Kubernetes concepts.
ConfigMap
Used for non-sensitive configuration:
Application Configuration
        ↓
    ConfigMap
        ↓
      Pod
        ↓
   Application
Secret
Used for sensitive information:
Password / Token
       ↓
     Secret
       ↓
      Pod
       ↓
 Application
Pod
A Pod runs one or more containers:
Pod
 │
 └── Container
       │
       └── Application
ServiceAccount
A Pod can have a ServiceAccount identity that applications use when communicating with the Kubernetes API.
Pod
 ↓
ServiceAccount
 ↓
Authentication
 ↓
Authorization / RBAC
 ↓
Kubernetes API Server
28. Important Commands from My Practice
Here is a clean reference list of the main commands I practiced:
# ConfigMap
kubectl get cm
kubectl create configmap cm1 --from-literal=user=john --from-literal=pass=k8s
kubectl describe cm cm1
kubectl get cm cm1 -o yaml

# Generate YAML
kubectl create cm cm2 --from-literal=tier=frontend --dry-run=client -o yaml > cm.yaml
vim cm.yaml
kubectl apply -f cm.yaml
kubectl edit cm cm2

# File-based ConfigMap
kubectl create configmap hostscm --from-file=./hosts
kubectl create configmap passwdcm --from-file=./passwd

# Directory-based ConfigMap
mkdir content
cp /etc/hosts content/
cp /etc/passwd content/
kubectl create configmap testcm --from-file=content

# Delete ConfigMaps
kubectl delete cm hostscm passwdcm testcm

# Secret
kubectl get secret
kubectl create secret generic sec1 --from-literal=pass=k8s
kubectl describe secret sec1

# Pod
kubectl run pod1 --image=nginx
kubectl get pods
kubectl describe pod pod1

# Enter container
kubectl exec -it pod1 -- /bin/bash

# Inside container
ls
cd /var/run/secrets/kubernetes.io/serviceaccount
ls
ls -l
cat ca.crt

# Kubernetes CA ConfigMap
kubectl get cm
kubectl describe cm kube-root-ca.crt
Conclusion
This practice gave me a practical understanding of how several Kubernetes components work together.
I started with ConfigMaps, first creating them with literal values and then managing them through YAML files. I also learned how to create ConfigMaps from individual files and entire directories.
Next, I practiced Secrets for storing sensitive information.
Finally, I created an Nginx Pod, inspected it with kubectl describe, entered the container using kubectl exec, and explored the automatically mounted ServiceAccount directory containing ca.crt, namespace, and token.
The overall Kubernetes workflow I practiced was:
Configuration
     ↓
ConfigMap / Secret
     ↓
Pod
     ↓
Container
     ↓
ServiceAccount
     ↓
Kubernetes API Server
These are fundamental Kubernetes concepts and provide a strong foundation for moving toward more advanced topics such as Deployments, environment variables, ConfigMap/Secret volume mounts, RBAC, ServiceAccounts, Services, Ingress, and production Kubernetes deployments.